Grandma Karen’s Best Challah
August 28, 2017 | By Jeremy Scheck | 18 Comments

Challah is a tender and subtly sweet egg bread made traditionally on Fridays for Shabbat. An authentic challah recipe should make two loaves and be dairy free. Many recipes I’ve seen do one or the other but not both. A traditional challah recipe makes enough for two loaves so one can be eaten Friday night and the second on Saturday. This is great if you observe the day of rest, but you can also give the second loaf to a friend as I do. Challah is supposed to be dairy free (despite many recipes I’ve seen calling for butter) because it’s meant to be eaten with a traditional kosher meat dinner. In addition, using oil—not butter—contributes to the characteristic soft texture.
Some semantics:
- It’s redundant to say “challah bread” (that’s like saying baguette bread)
- The plural of challah is challot (ha-LOTE) not “challahs”
When made correctly, challah is a treat enjoyed by Jews and non-Jews alike—eaten on its own, used to sop up the last bits of matzah-ball soup, or as the base of French toast.
A few more notes…
Making it ahead: It can be a lot of work to make the dough and bake it all in one day, so I often make the dough one day and do a slow rise in the refrigerator overnight. The next day, you just have to braid the dough, let it do the second rising, and bake.
My grandma and I like to make the dough in a stand mixer fitted with the dough hook, but you could certainly make it by hand.
Grandma Karen and I have lots of ***starred tips in the footnotes.
Grandma Karen's Best Challah
Ingredients
- 1–1/4 cups (288ml) water
- 1 tablespoon sugar
- 3–1/4 tsp active dry yeast
- 1/3 cup (65g) canola oil or olive oil
- 1/3 cup (100g) honey
- 3 large or extra large eggs
- 2 tsp kosher salt
- 5–6 cups (650–780g) King Arthur Bread Flour
- 1 egg beaten well with 2 teaspoons of cold water
- Poppy or sesame seeds or Maldon salt (optional for sprinkling)
Instructions
- In a large (at least 4 cup) measuring cup or microwave safe bowl, heat the water in the microwave on high heat for 50 seconds.* Of the warm water, mix about 1/4 cup with the sugar and yeast in a small bowl. Set the yeast mixture aside.
- In the large measuring cup with the rest of the warm water, whisk the canola oil and honey and with the water.** Add the eggs and beat well.
- In the bowl of a stand mixer fitted with the dough hook (or a large mixing bowl to make by hand), add 5 cups of the bread flour and the salt. Let mix on low briefly to distribute the salt evenly. Add the water/egg/honey/oil mixture on low, then the now foamy yeast mixture.
- Let knead on medium low speed (#2) for about 10 minutes, adding about 1/2 cup more flour as necessary if the mixture looks really wet (or knead manually for 10 minutes).
- Once the dough mostly releases from the sides of the bowl, forming one mass, turn off the mixer. It should be a little tacky and very elastic. Err on the side of adding less flour; after the first rising, the stickiness will subside.
- Take the dough out, place on a lightly floured surface. Clean the mixer bowl, then coat with a little oil. Return the dough to the bowl, and cover with greased aluminum foil. At this point you can place the bowl in the fridge to use the next day or let rise for 1-2 hours in a warm place.***
- My grandma and I like to shape our challah with a large 3 strand braid on the bottom, and a smaller 3 strand braid stacked on top. We weave the two ends together. This shape gives more height to the loaf and definition to the plaits. You can just do a three stranded braid but it will be more flat.
- Place both braided loaves on separate baking sheets lined with silpats or parchment.
- Preheat the oven to 400° F.
- Let the loaves rise on the counter top, uncovered, for between 1–3 hours.****
- Brush the egg wash (from the final prep ingredients) onto one loaf. Sprinkle with poppy or sesame seeds to taste.
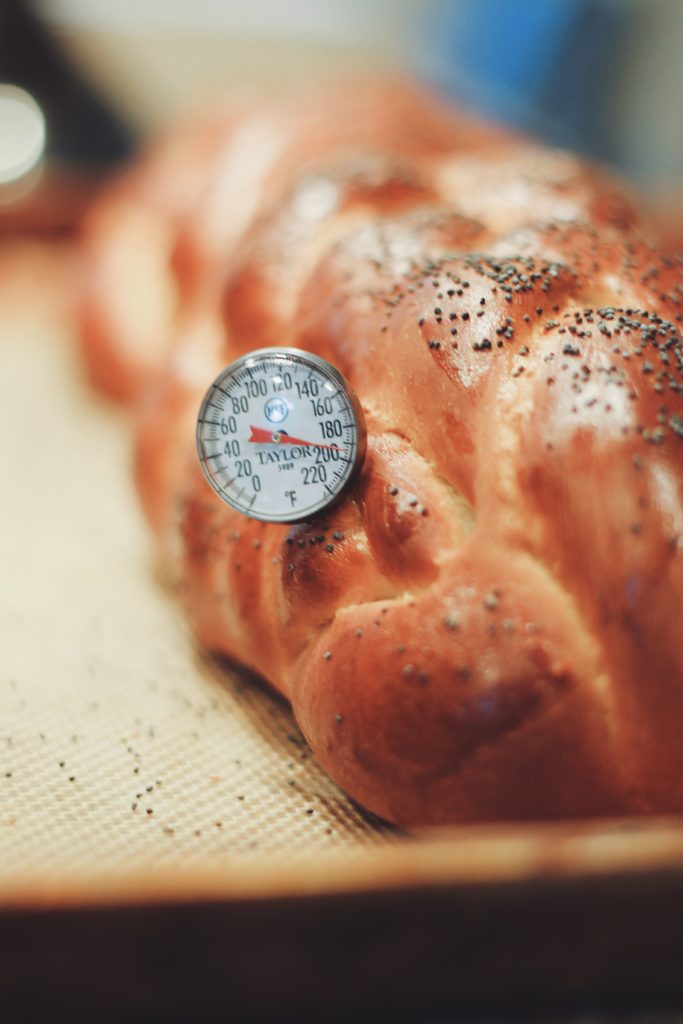
- Put the first loaf in the oven, and change the setting to 375° F Convection. Bake for 25 minutes, until a thermometer inserted into the loaf exceeds 185° F.
- Repeat with the second loaf.
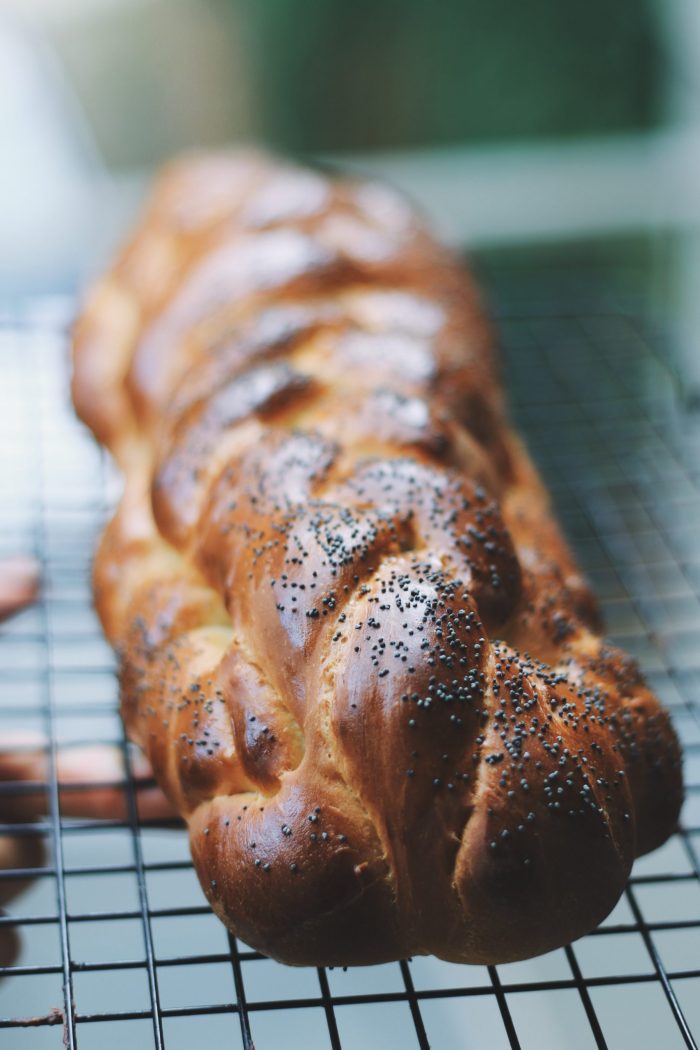
- Cool on a wire rack before cutting into.
Notes

Stick an instant-read thermometer into a groove to take the internal temperature
Jeremy Scheck spent high school perfecting his signature cupcakes, making quiches and coffee cake by the dozen at a local bakery, and teaching cooking demonstrations at Williams-Sonoma. As a 10th grader in 2016, he began documenting his favorite recipes on a blog called The After School Bakery. In college, Jeremy learned to make 50 gallons of ice cream in the food science lab, how to prune grape vines in the teaching vineyard, the best way to milk a cow in Northern Italy, and why film photography is an art worth saving. As a sophomore in 2020, he traded blog photos for video and became a TikTok culinary sensation. Jeremy has been featured on the Today show, The Washington Post, Bloomberg, BBC Radio, People, and Access Hollywood, among others. Jeremy is a graduate of Cornell University with a double major in Spanish and Italian, and significant coursework in food science. He lives in Brooklyn, NY. Learn more about Jeremy.

I’ve made this recipe at least 6 times and its turned out perfect every time. Playing around with what you add on top for sprinkling is always fun!
I love making this recipe! It is great for making french toast or sandwiches with, or even just eating it plain is delicious! Recipe is very easy to follow and turns out perfect every time.
Tried this recipe today! Great as always. Wanted to stress that if you are not using a stand mixer, you should knead before the first rise! Also, after leaving my dough for the second rise for about 1.5 hours, I noticed a thicker crust than desired, and it started to flatten out. This could be my doing, but I was wondering if anyone had any input. I also cant quite get as dark and glossy an exterior…. any insights?
it sounds like maybe there was something wrong with your yeast? Also, the glossy exterior comes from egg wash. Did you use it?
I have made this recipe almost every week for the past 6 months — it’s really wonderful. I’ve definitely messed it up a few times (always my mistakes), but it’s delicious and a very successful recipe. Thank you Grandma Karen!
Each loaf is baked separately? Thanks!
yes, that is preferable. it’ll bake more evenly
Tried this recipe for the first time. Turned out so well. My entire family thoroughly enjoyed it
Made this for Rosh Hashanah yesterday — I’ve made a lot of challahs in my day and this is definitely the softest and springy-ist. Will definitely be making again, thanks Jeremy 🙂
This was literally the best thing I’ve ever made!
Made for Rosh Hashanah and added a couple handful of raisins! Super yummy! thanks.
I make this recipe every Friday night when I’m home from college. Everyone who has tried it has asked for the recipe and I send them this website to make it!! I usually bake it for around 15 mins so it comes out a little raw hahah and I love it
This is by far the best Challa I’ve ever made/had! This is the only recipe I’ll ever use!
This looks great! Do you think we could add raisins to this? And if so; at what point; after the first rise, I’m guessing.
I would also like to know the answer to this! Cinnamon and raisins? When to add and how much?
This is literally the best bread I’ve ever made and eaten in my life. Bless up and thank you bro (and your grandma) for this recipe.
My dough didn’t rise when I put it in the fridge overnight
I love this recipe! Thank you so much for sharing! I don’t have a stand mixer and have been needing by and, but it’s SO WET AND STICKY. I’m fairly certain it’s supposed to he that way, because it comes out perfectly every time, but I was hoping to get confirmation on that and see if there anything I can do to get it less stuck to my hands? I flour them up, but that’s gone pretty quick. Thank you!!